 |
| Add caption |
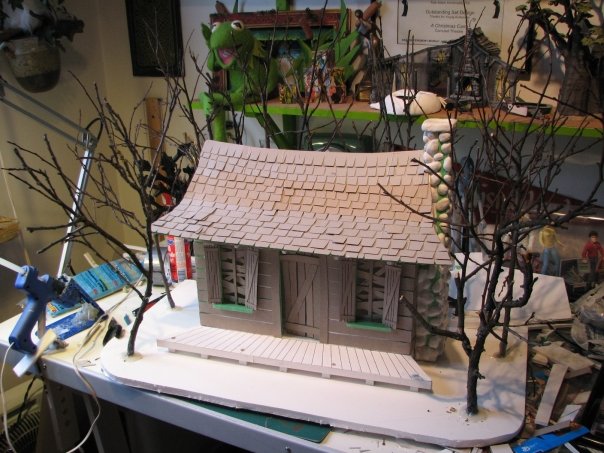
This project was a gift for a friend at DRS Productions. It was for the lobby of the Evil Dead Musical they were producing in vancouver, BC.
 |
| Here is the cabin as seen in the movie Evil Dead |
 |
| I added boards on the windows for added effect with the lighting |
 |
| Building is shallow to fit on shelf |
 |
| Leaves are real leaves from Micheal's craft store crumpled up and sprinkled over glue. |
 |
| It all begins with foam core and twigs |
 |
| The porch is forced perspective to give false depth when viewed from the front |
 |
| Stonework is made with Crayola Model Magic air dry compound. |
 |
| Boards are drawn into foam core and will be painted later. |
 |
| Roof tile is cereal box (best thing to keep around for modeling) |
 |
| I made the shingles smaller as it went up higher to add to the forced perspective effect |
 |
| Cereal box trim and boards |
 |
| Twig posts added in |
 |
| More twigs added as trees. I know there would be light and these twigs will light up nicely. |
 |
| Paint treatment begins. Age and weathering. |
 |
| Notice the chimney is black before stone finishing treatment |
 |
| Dry brushing always gives an aged and dramatic effect |
 |
| Tissue paper and glue is placed all over ground to cover surface |
 |
| Stone paint treatment |
 |
| Leaves added when glue is still wet...it will vanish later |
 |
| Leaves really add the Evil Dead feel!! |
 |
| Me standing with the model for scale! Notice the moon in the tree... |
Thanks again you guys, hope you liked it!

7 comments:
Wow... really enjoying your work! I look forward to combing through your older posts!
That's pretty awesome!! Your stuff is so detailed, oh and fantastic :)
Nice work, that is very cool.
Me ha encantado!
Me ha encantado!
Phenomenal. I can't believe I found this! (Deep google image drilling) I am about to begin my own and was image searching when I found yours. Any advice for one seen from all sides?
Can you show us how you painted it in steps?
Post a Comment