Hey everyone! Thanks so much for checking out my blog! I'm so excited to share with you my most recent miniature creations which I call:
"Mother Earth and the Four Seasons"
 These four miniature displays are the FISRT in a series that will explore the fantastical world that only exists in Cree stories and legends.


It shows us a place
where culture and tradition live in harmony with Mother Earth and all
her beautiful creatures. Where animals and humans speak the same
language and walk hand in hand. Where the trees protect the land and the
Creator watches them all.

I used to love hearing the stories and legends of my people. They would fill me with excitement and wonder, allowing me to escape the everyday and
imagine a better place. Join me in my "memories in a bottle", and help
me celebrate the beauty, magic and wonder of the Cree people.

I always love working in miniature because it forces people to stop,
move in closer and look deeply at things but with a careful, delicate and respectful energy.
With this new miniature collection I thought it would be nice to have that same
gentle energy given towards the culture of my people. Especially in
these tumultuous times. I
put glass domes on these dioramas because these stories and legends are
precious, important to protect and celebrate, more so lately than ever
before.
Please enjoy these pictures of "Mother Earth and the Four Seasons", the first story in my newest miniature collection.

Each diorama is 12' tall by 7" wide and took around 2 weeks to create and around 30-40 hours for all four combined.

Below is the cowboy horse (which will be painted into an Indigenous owned horse) for scale.

This collection represents the four seasons and is influenced by my homeland in the Woodland Cree, Treaty 8 territory of northern Alberta. I always say that we experience 4 VERY DIVERSE and AUTHENTIC Seasons lol, each one more beautiful than the next.

"SPRING"

Spring is a time for renewal and rebirth. The snow melts and the flowers bloom. A young girl talks with her friend and gives her some flowers she found in the meadows.
This figure was a non indigenous farm worker, altered with paint and thread hair to become an indigenous Cree woman.


The ribbons and cloths on the trees are made from thread. They actually represent offerings back to the earth. Swatches of colourful broadcloth, known as prints, are tied to trees usually following a sweatlodge or pipe ceremony conducted by members of the Indigenous nation. Prints are deeply personal and represent the prayers, hopes and aspirations of participants.

The lights inside create a nice fire glow and really make the tipis seem magical! The LED lighting used was purchased from an inexpensive dollar store. Very cheap but effective!


Backside features a horse and her new baby. I like to try and keep all sides interesting.

"SUMMER"

The summer diorama features herb pickers, horseback riders and tree climbers.


Wesakechak, the benevolent "shapeshifting" hero of the Cree people, hides in the tree


"FALL"

I love the colors of fall and this windy day diorama has lots! The leaves and ribbons fly as dad searches for his young son....

I love the foliage in this one. This is a pre-made foliage you can buy in bulk. Its very diverse, easy to use and saves a lot of time.

The flags on the tipi poles are in the four colors of the medicine wheel. Black, White, Yellow and Red.


I just love how detailed this foliage is, so accurate for Alberta trees.

The young child runs and plays with the geese as they enjoy the windy day and share a laugh or two. Could this be Wesakechak?


The bark on the branches below are so perfect as tree trunks...no painting required!!!

Eagle's view!

The other geese watch on in wonder. Why are that acting so silly?

"WINTER"

Its a quiet winter night and a young woman watches for her husband who is out on the hunt....

Little does she know he is closer than she thinks!

You can see some of the prairie grasses are still showing through the snow.


I just love how this winter scenes lights up, and the snow glitters.

Looks frosted and sparkly!

This flagpole is in memory of loved ones lost.


"MAGIC IN THE NIGHT"

Things are so much more magic at night, illuminating the tipis as the spirits dance in the trees!


Here are the domes completed, glass cover in place, and ready to be displayed.


-Lance Cardinal
"THE PROCESS"

Everything that I purchased for this project was from a hobby shop. I did pick some branches from the river valley in Edmonton.

I bought pre-made HO scale figures from the train section which is the scale I will be doing my dioramas in. I will alter these later with string and paint to make them Cree characters.

I got some enamel paint for the base on the characters because it lasts a long time

Here is a tiny horse to show you the scale of how small these characters are. This will go from a cowboy horse to a Cree horse with paint.

I bought these pre-made glass domes from the local art supply store. They cost around $25 each.


in order to accommodate the battery pack I have to attach on the bottom I need to put legs on as well. So I just got some wooden beads


All the legs are in place and now they're ready for paint and diorama work


Switching arms from up to down


you can see I use black thread and glue to put hair on the characters and then paint it black


I painted the bases block so that scene will pop more


Time to make teepees, first I make a pattern he cut them off paper as well as doors.

Then I draw the shape of the base the size I want it on foam core

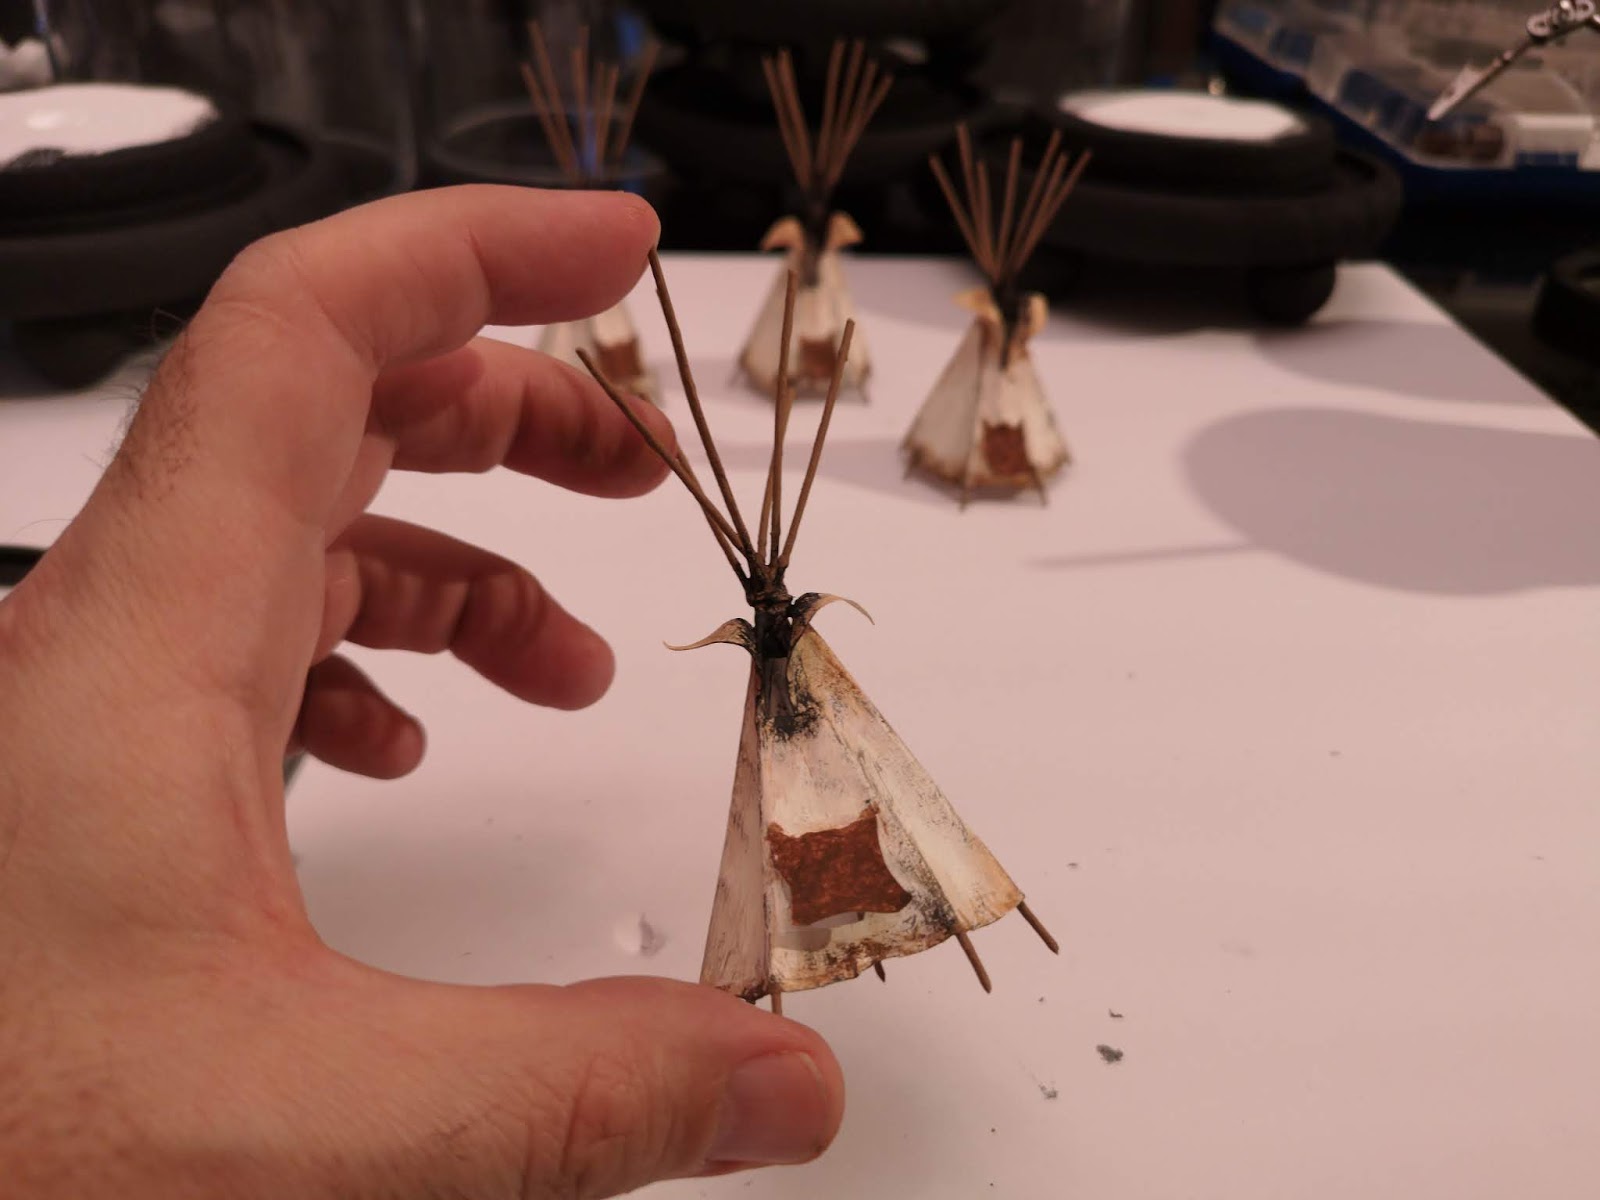
then I use thin wire to create the tipis. It's easy to use and sticks into the foam core to hold in place

although it's not the traditional amount of poles I couldn't do the regular number because of thickness.

Then secure tipi cover 2 wire with glue

Painting glue on the TV will create a more tight look and sunken in

Now the poles get painted brown


he gave the tipi some treatments as if they've been out in the wilderness for a long time. I used research photos for this effect


the grass is available in sheets at The Hobby Shop

Measure and glue into place

I tried to choose twigs that were tall and slim


All the strings are hand-tied

Bushes are added


Battery pack from the dollar store. It was $2 in the wedding section.

cut a hole in the bottom and string through. Then glue the pack to the bottom

at one point I had experimented with putting smoke but I changed my mind

the TV light is gluten first and then the rest of the wire goes behind the back tree to the top

Secured into place


This is how messy I get lol! Creative messes are the best!!


These pre-made bushel packs are amazing I can quit whenever I want


I want the winter scene to be a bit less bushy


This is me testing the paint on the wood

I decided to paint everything white and I glitter so it was really really snowy


the foliage was purchase at the local art supply store. It came white and I just made it into a bush for the top


I used HO scale grass for the dead tall Grass coming thriugh the snow, but I put it down first


Ready for snow


I use an Air Dry lightweight modelling compound found at any toy store or art store. I had to let it dry 24 hours.
At the VERY LAST MINUTE I decided to change the tipi's skin to be more realistic and have flap poles. I wont bore you wth the process...its the same as the first. Just no paint this time so they glow better.
Almost done!!!!


I put a shield around the bottom of the base so I could spray the final cementing liquid over the whole thing.

Trying to keep things a little bit less messy

that's it guys! Thanks for checking out this behind-the-scenes look. if you want to see the final product just go back to the top! hope you have a great day and keep inspired everyone!!